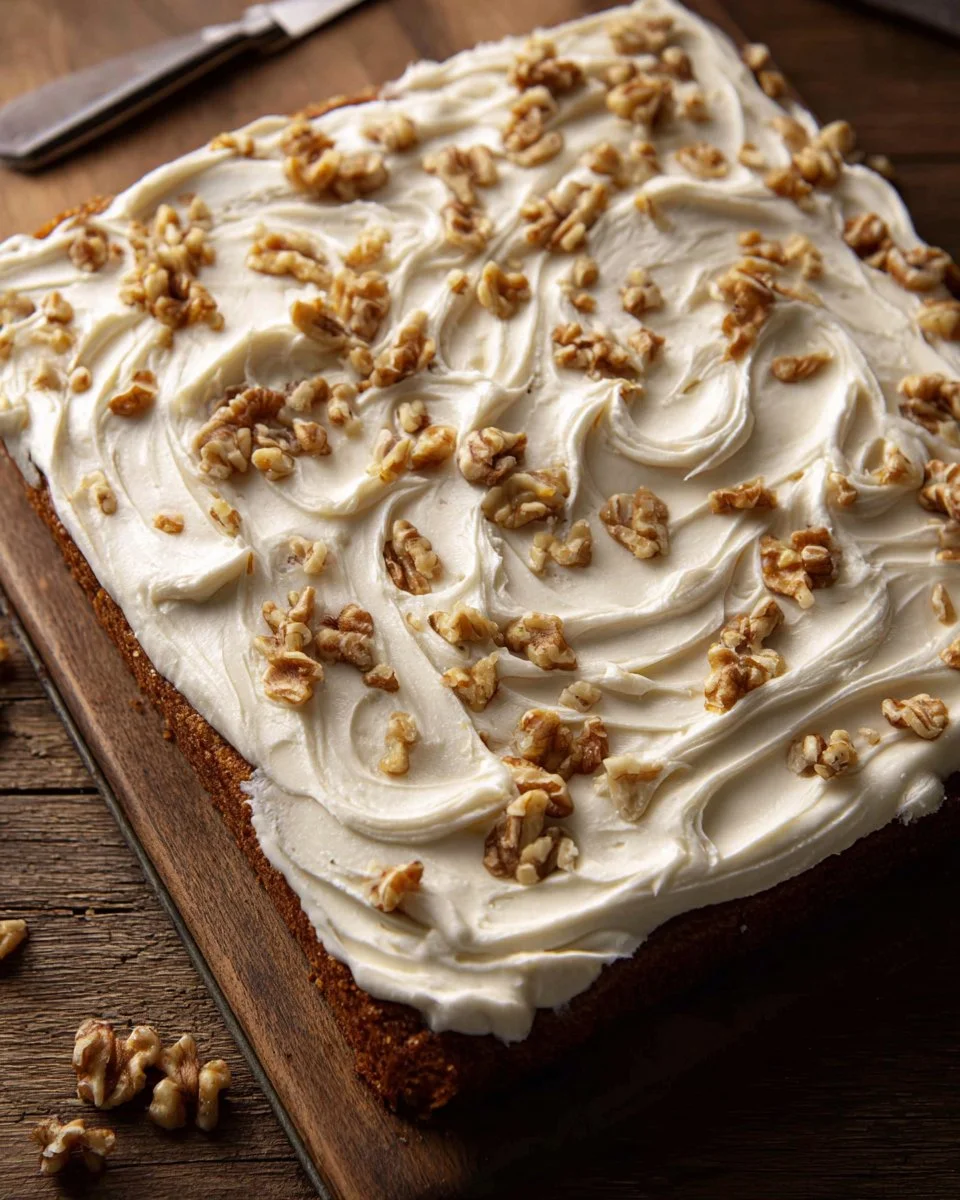
As someone who adores the warm embrace of home-baked treats, there’s nothing quite like a slice of cake that reminds me of family gatherings. I can still hear my grandmother’s laughter echoing in the kitchen as she whipped up a batch of her famous carrot cake, the sweet aroma mingling with cinnamon spice and childhood memories. It’s this nostalgia that inspired me to create these Sheet Pan Carrot Cake Bars, perfect for feeding a crowd while delivering that same comforting flavor I cherish.
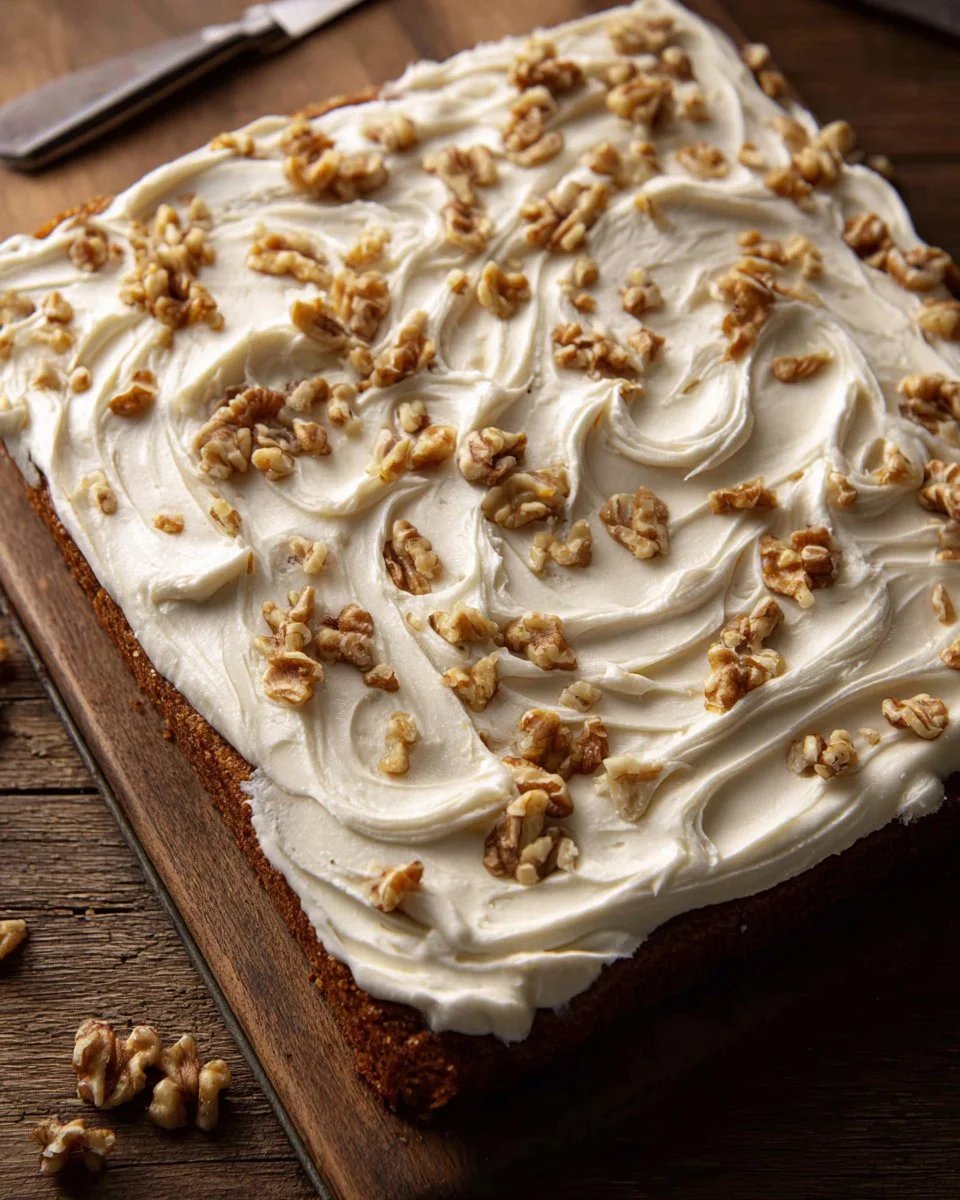
What makes these bars truly special? They are moist, rich, and stacked with the goodness of finely grated carrots, crunchy walnuts, and sweet pineapple—with a luscious maple frosting that will make you swoon! Unlike many traditional layered cakes, these bars are a breeze to make and require minimal fuss—ideal for both the novice baker and seasoned pro. Plus, sharing a pan of these delightful bars has become a favorite family tradition of mine.
In this post, you’ll learn how to whip up these delicious Sheet Pan Carrot Cake Bars with my foolproof step-by-step guide. So, preheat that oven, and let’s dive into this wonderfully delicious recipe!
What Are Sheet Pan Carrot Cake Bars?
Sheet pan carrot cake bars are, as the name implies, a delightful twist on the classic carrot cake, baked in a large sheet pan. This creative format allows you to achieve that same spiced flavor and moist texture but in a more manageable, easy-to-slice form. Originating from the traditional carrot cake, which has roots in medieval European cuisine, these bars have evolved to become an American favorite, often enjoyed during potlucks and family celebrations.
What sets them apart is not just their simplicity but also their delightful combination of flavors and textures. Each bite is a perfect harmony of sweetness from the carrots and pineapple, the slight crunch of walnuts, and the aromatic spices like cinnamon and nutmeg. Whether you have them for dessert or as a mid-afternoon snack, they never fail to bring a smile!
You’ll want to make these bars for birthdays, holidays, or just when you need a little comfort—because who doesn’t love a slice of cake that feels like a warm hug?
Why You’ll Love This Recipe
When it comes to baking, I want my creations to be not just delicious but also impactful. Here are a few compelling reasons why these Sheet Pan Carrot Cake Bars will quickly become a staple in your kitchen:
A Crowd-Pleaser: With their generous yield from a large pan, these bars are perfect for parties or family gatherings—everyone will be reaching for seconds!
Time-Saving: Unlike traditional layered cakes that require assembling and frosting, making these bars is a simple mix-and-bake process, saving you precious time.
Budget-Friendly: Costing just a fraction of store-bought desserts, you can whip up a batch without breaking the bank. Plus, the ingredients are usually pantry staples.
Customizable: Whether you prefer walnuts or pecans, or want to add raisins or dried cranberries, this recipe is versatile and can adapt to your tastes.
Straightforward Instructions: Don’t fret if you’re new to baking—this recipe simplifies the process, ensuring that you can enjoy delicious results without feeling overwhelmed.
What’s not to love? You’ll be amazed at how easily you can bring these delightful bars to life in your kitchen!
Ingredients
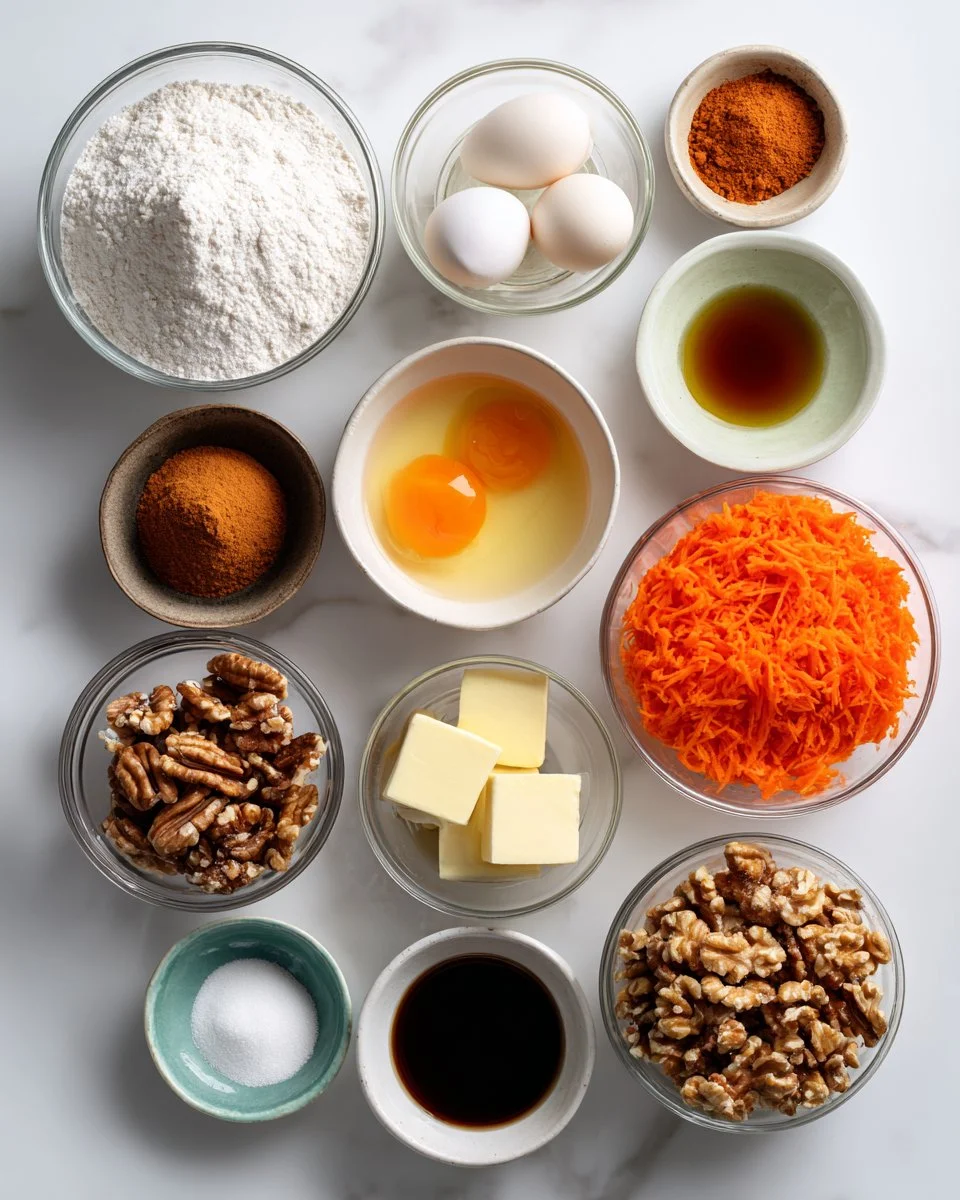
Here’s what you’ll need to make these Sheet Pan Carrot Cake Bars:
- 2 cups (400 g) granulated sugar: For sweetness; adjust based on personal preference.
- 1 1/4 cups (250 g) vegetable oil: Keeps the cake moist; you can substitute with melted coconut oil for flavor.
- 1 teaspoon pure vanilla extract: Adds warmth; always choose high-quality.
- 3 large eggs, room temperature: Room temperature eggs mix better into your batter.
- 2 3/4 cups (352 g) all-purpose flour: Essential for structure; for gluten-free options, use a gluten-free baking mix.
- 2 teaspoons ground cinnamon: The aromatic spice that defines carrot cake.
- 1/4 teaspoon nutmeg: A pinch enhances the warm, cozy flavors.
- 2 teaspoons baking soda: Helps the cake rise.
- 1 1/2 teaspoons kosher salt: Balances sweetness.
- 1 cup (117 g) walnuts, roughly chopped: Provides a satisfying crunch; can be replaced with pecans.
- 2 1/4 cups (248 g) finely grated carrots (about 5 medium carrots): The star ingredient; fresh is best!
- 1/2 cup (98 g) crushed pineapple, drained: Adds moisture and sweetness; make sure it’s well-drained.
- 1 cup (2 sticks / 227 g) unsalted butter, room temperature: For frosting; room temperature helps it beat smoothly.
- 1/3 cup (105 g) pure maple syrup: Rich flavor that complements the frosting.
- 1 teaspoon maple extract: Enhances the maple flavor.
- 3-4 cups (375-500 g) confectioners’ sugar: For the frosting; the amount depends on your desired consistency.
- Walnuts, chopped for garnish (optional): For that finishing touch.
Ingredient Quality Notes:
- Seek out fresh, local carrots for the best flavor.
- When buying walnuts, roasted adds more depth to the taste.
- Always use pure extracts over artificial for a richer flavor.
Prep Notes: Make sure your butter and eggs are at room temperature to guarantee creamy and well-mixed batters.
Step-by-Step Instructions
Preparation:
Preheat your oven to 350°F (175°C) and line a 10×15-inch sheet pan with parchment paper for easy removal and cleanup.
In a stand mixer bowl, combine the sugar, vegetable oil, vanilla extract, and eggs. Mix on medium speed until the mixture is light yellow and thickened, around 3-5 minutes.
Chef’s Tip: Make sure your eggs are at room temperature to prevent the batter from clumping.
In a separate bowl, whisk together the flour, cinnamon, nutmeg, baking soda, and salt.
Gradually add the dry ingredients to the wet mixture on low speed until just combined—don’t overmix!
Fold in the walnuts, grated carrots, and crushed pineapple.
Pour the batter into the prepared pan, spreading it evenly with a spatula.
Bake for 24-28 minutes or until a toothpick inserted into the center comes out clean. The tops should be golden brown and the edges slightly pulling away.
Visual Cue: The cake should spring back when lightly pressed.
Let cool completely in the pan before frosting.
For the Frosting:
In a mixing bowl, beat together the butter, maple syrup, and maple extract until creamy.
Gradually add confectioners’ sugar, mixing until you reach your desired frosting consistency.
Frost the cooled cake and sprinkle with chopped walnuts if desired.
Cut into bars and serve!
Common Mistakes to Avoid:
- Not measuring ingredients properly.
- Overmixing the batter, leading to denser bars.
- Forgetting to let the cake cool completely before frosting can result in a melty mess.
Expert Tips & Tricks
For the best results with your Sheet Pan Carrot Cake Bars, keep these expert tips in mind:
Ingredient Quality: Use the freshest eggs, carrots, and purees; they make a world of difference in flavor!
Make-Ahead Option: You can prepare the batter a day in advance—just store it in the refrigerator and bring to room temp before baking.
Storage Recommendations: These bars can be kept at room temperature in an airtight container for up to 3 days. In the fridge, they can last up to a week. For longer storage, freeze for up to 3 months.
Troubleshooting: If your bars sink in the middle, they likely haven’t baked long enough; a quick toothpick test will confirm doneness.
Frosting Variations: Feel free to experiment with flavored extracts or add zest from an orange or lemon for a citrusy twist.
Cupcake Version: If you’re feeling fancy, pour the batter into cupcake liners for a portable twist!
Serving Suggestions
These moist Sheet Pan Carrot Cake Bars are delightful on their own but become even more special when paired with a dollop of whipped cream or vanilla ice cream on the side.
For an extra touch, try serving them with a freshly brewed cup of coffee or tea—it’s the perfect pairing for an afternoon treat. Share these bars at birthday parties, or holiday gatherings, or simply enjoy them during a cozy night in.
Variations & Substitutions
Looking to shake things up? Here are some fantastic variations:
- Tropical Twist: Substitute the walnuts for macadamia nuts and toss in shredded coconut.
- Spiced Medley: Add ginger or cardamom for a different flavor profile.
- Dietary Adjustments: If you’re gluten-free, simply substitute with a 1:1 gluten-free baking flour. For a vegan version, use flax eggs and a dairy-free butter substitute.
Feel free to experiment seasonally—orange zest in spring or dried cranberries in winter adds festive flair.
Nutrition & Storage Info
- Prep Time: 15 minutes
- Cook Time: 28 minutes
- Total Time: 43 minutes (excluding cooling time)
- Yield: 24 bars
- Estimated Calories: 250 calories per bar (varies by size and frosting)
Storage Instructions:
- Room Temperature: 3 days in an airtight container.
- Refrigerated: Up to a week.
- Freezer: Up to 3 months, wrapped tightly in plastic wrap and then foil.
FAQ Section
Can I make these bars gluten-free?
Yes! Use a gluten-free baking mix in place of all-purpose flour.What should I do if my batter is too thick?
You can add a tablespoon of milk or water to loosen it up slightly.Can I use fresh pineapple instead of canned?
Absolutely! Just finely chop and ensure it’s well-drained.How long will these last?
Unlike many desserts, these bars are known for their staying power; they’ll last several days if stored properly.Is there a way to make this recipe lower in sugar?
Yes, you can reduce the sugar by 1/2 cup or substitute with a sugar alternative.What can I substitute for eggs in this recipe?
Flax eggs (1 tablespoon of ground flaxseed mixed with 2.5 tablespoons of water per egg) work well!How can I make the frosting thicker?
Simply add more confectioners’ sugar until you get your desired thickness.What’s the best way to store leftovers?
Keep them in an airtight container at room temperature or pop them in the fridge for longer freshness.Can I freeze the unfrosted bars?
Yes! Just wrap them tightly in plastic wrap then foil before freezing.Can I add other mix-ins?
Certainly! Raisins, coconut, or even chocolate chips can elevate the flavor.
Conclusion
These Sheet Pan Carrot Cake Bars resonate deeply with me, capturing the essence of beloved family memories and the warmth of home baking. They are a delightful treat that you’ll find yourself reaching for time and again. I encourage you to whip up a batch and share them with your loved ones—watch their eyes light up with joy!
I would love to hear your thoughts, so don’t forget to leave a comment below or share your own variations. And if you’re yearning for more delectable recipes, check out my collection of sweet treats on the blog!
Happy baking!
This format emphasizes a personal touch while providing comprehensive information, all aimed at engaging readers and boosting SEO. Enjoy crafting your delicious Sheet Pan Carrot Cake Bars!
Sheet Pan Carrot Cake Bars
Ingredients
Method
- Preheat your oven to 350°F (175°C) and line a 10×15-inch sheet pan with parchment paper.
- In a stand mixer bowl, combine the sugar, vegetable oil, vanilla extract, and eggs. Mix until light yellow and thickened, about 3-5 minutes.
- In a separate bowl, whisk together the flour, cinnamon, nutmeg, baking soda, and salt.
- Gradually add the dry ingredients to the wet mixture on low speed until just combined.
- Fold in the walnuts, grated carrots, and crushed pineapple.
- Pour the batter into the prepared pan and spread evenly with a spatula.
- Bake for 24-28 minutes or until a toothpick inserted comes out clean and the tops are golden brown.
- Let cool completely in the pan before frosting.
- In a mixing bowl, beat together the butter, maple syrup, and maple extract until creamy.
- Gradually add confectioners’ sugar, mixing until you reach your desired consistency.
- Frost the cooled cake and sprinkle with chopped walnuts if desired.
- Cut into bars and serve!