Irresistibly Soft Strawberry Thumbprint Cookies: A Sweet Journey to Comfort Baking
There’s something magical about the scent of fresh-baked cookies wafting through your home. I remember the first time I made Strawberry Thumbprint Cookies—it was a typical rainy afternoon, and I found myself nostalgic for the warmth of my grandmother’s kitchen. I had just a few ingredients on hand, but a jar of strawberry jam caught my eye, and suddenly, I was whisked back to my childhood, spending summer days baking with her.
These Strawberry Thumbprint Cookies are more than just a treat; they’re a sweet embrace of family memories, laughter, and the simple joys of life. What makes them so special is not just their melt-in-your-mouth, buttery texture paired with the tartness of strawberry jam, but also that they’re incredibly easy to make! Unlike many other cookie recipes that can be complicated with fussy steps, this one encourages you to get your hands messy and enjoy the process.
In this post, I’ll guide you step-by-step through creating your own perfect batch of these delightful cookies. Whether you’re sharing them with family or hiding them away for a midnight snack, I promise you’ll find a new favorite in this classic recipe.
What Are Strawberry Thumbprint Cookies?
Strawberry Thumbprint Cookies date back to the early 19th century, with origins in Europe. They’re distinguished by their signature “thumbprint” indentations, typically filled with fruit preserves, like strawberry jam, and dusted with powdered sugar. The result? Crunchy edges and a heavenly soft center bursting with flavor.
These cookies are a beautiful balance of sweet and tangy, with the jam creating a delicious contrast to the buttery dough. Each bite brings forth a delightful chewiness that is sure to transport you to a cozy moment, echoing the very heart of home baking.
They make a perfect treat for any occasion—from holiday gatherings to afternoon tea with friends, or even just a cozy Sunday by yourself.
Why You’ll Love This Recipe
- Simplicity: This recipe is straightforward and requires minimal ingredients, making it perfect for beginner bakers and seasoned pros alike. You won’t find any complicated processes here—just pure, honest baking.
- Cost-Effective Comfort: Making these cookies at home saves you money compared to expensive store-bought versions. Why spend a fortune when you can whip up a gorgeous batch without breaking the bank?
- Customization Galore: The best part? You can easily customize this recipe! Feel free to swap out the strawberry jam for any other flavor you adore—raspberry, apricot, or even lemon curd!
- Quick Prep and Bake Time: In less than an hour, including prep time, you can have a fresh batch of cookies cooling on your counter. Perfect for those last-minute cravings or unexpected guests!
- Family-Friendly Fun: This is the ideal recipe to get the kids involved! Rolling the dough balls and creating thumbprints is both fun and safe for little hands. Plus, they’ll enjoy indulging in their handy work!

Ingredients
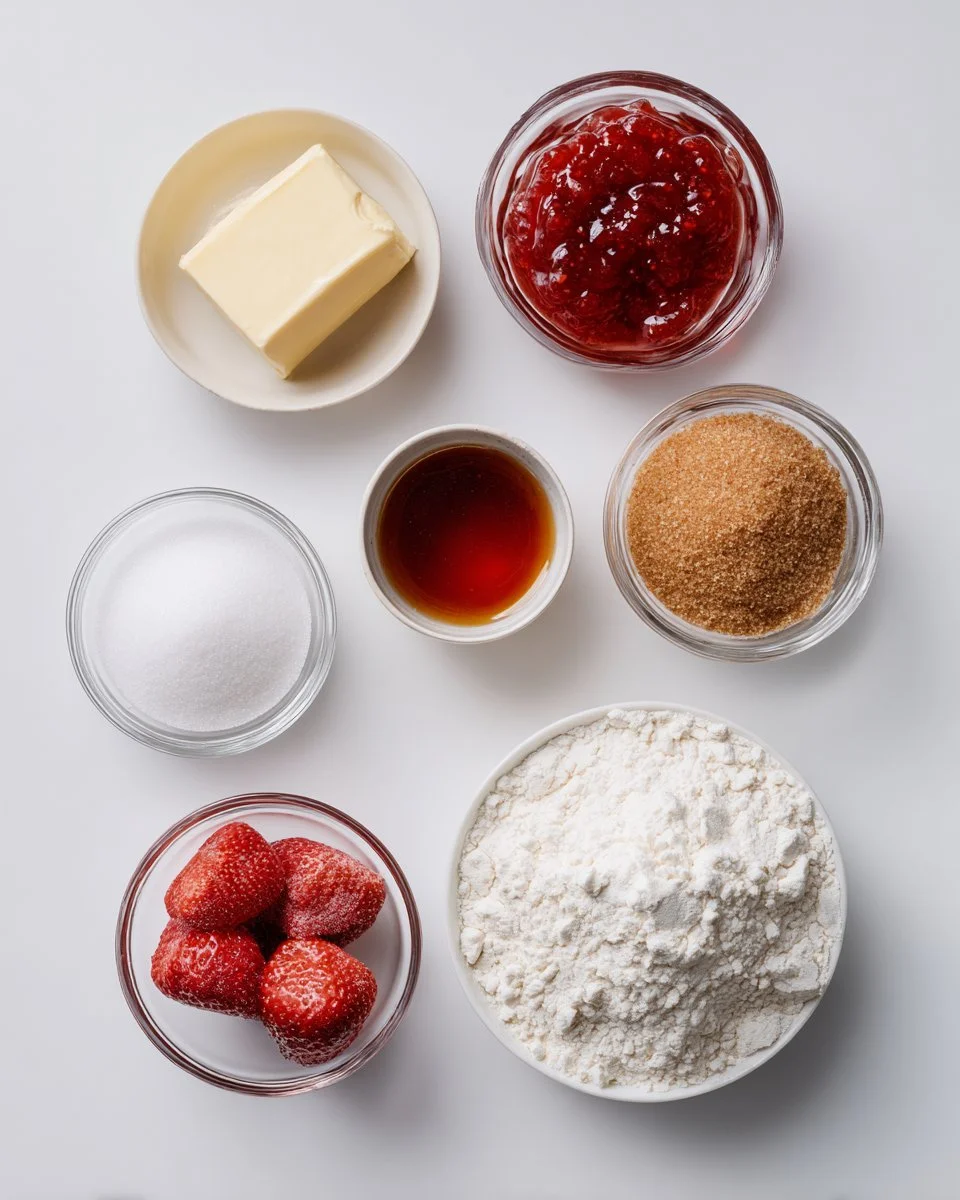
To create these delicious Strawberry Thumbprint Cookies, gather the following ingredients:
- 1 cup unsalted butter, softened (It’s best to take it out of the fridge an hour before baking for optimal creaming.)
- 1/2 cup granulated sugar (I prefer using organic cane sugar for a natural taste.)
- 1/4 cup brown sugar, packed (This adds a lovely depth of flavor.)
- 1 teaspoon vanilla extract (Use pure vanilla for the best outcome—trust me!)
- 2 cups all-purpose flour (For chewy cookies, consider measuring carefully.)
- 1/4 teaspoon salt (Don’t skip this; it enhances all the flavors!)
- 1/2 cup strawberry jam (I love using homemade jam, but any store-bought version works too—opt for a brand with real fruit for extra flavor.)
Make sure all your ingredients are at room temperature for the best results!
Step-by-Step Instructions
- Preheat your oven to 350°F (175°C). This ensures that your cookies will bake evenly and thoroughly!
- In a large mixing bowl, cream together the softened butter, granulated sugar, and brown sugar until light and fluffy. This should take about 3–5 minutes—don’t rush it! You’re looking for a pale, airy mixture.
- Add in the vanilla extract and mix until fully combined. Enjoy that fantastic aroma wafting through your kitchen.
- Gradually add in the flour and salt, mixing until just combined. Be careful not to over-mix, or your cookies may turn out tough. A few flour streaks are okay.
- Roll the dough into small balls, about 1 inch in diameter, and place them on a baking sheet lined with parchment paper, ensuring enough space in between for spreading.
- Use your thumb (or the back of a spoon) to create a small indentation in the center of each ball. This is the signature move for thumbprint cookies!
- Fill each indentation with a dollop of strawberry jam. Aim for just enough to fill without overflowing, as it will spread during baking.
- Bake for 12-15 minutes or until the edges are lightly golden. Keep an eye on them to prevent overcooking!
- Let them cool on the baking sheet for a few minutes before transferring to a wire rack to cool completely. Enjoy your delicious Strawberry Thumbprint Cookies!
Expert Tips & Tricks
- Baking Tip: Make sure your butter is at room temperature. If it’s too cold, it won’t cream properly, resulting in dense cookies.
- Storage: Store your cookies in an airtight container at room temperature for up to a week, or in the fridge for even longer freshness.
- Make Ahead: You can prepare the dough a day in advance; just keep it wrapped tightly in plastic wrap.
- Troubleshooting: If your cookies spread too much, try chilling your dough for about 30 minutes before baking. It helps to firm it up!
- Filling Fun: Play with different jam or preserve fillings, or use nut butters for a twist.
- Remember: Watch your cookies closely as they bake (these little beauties can go from perfect to too brown quickly!).
Serving Suggestions
Strawberry Thumbprint Cookies can stand on their own, but why not elevate your dessert game? Serve them alongside a scoop of vanilla ice cream, or plate them with a sprinkling of powdered sugar for a beautiful presentation. They also make a delightful addition to any tea party, bridal shower, or spring gathering.
Variations & Substitutions
Get creative with these delicious cookies! Here are a few ways to switch it up:
- Flavor Combinations: Substitute the strawberry jam for other flavors like blueberry, raspberry, or peach. You can even use chocolate hazelnut spread for a rich, decadent treat.
- Dietary Adaptations: If you’re looking for gluten-free options, use almond flour combined with a gluten-free baking blend. For a vegan twist, substitute butter with coconut oil and use a flax egg instead.
- Seasonal Variations: Make festive versions by adding spices like cinnamon or nutmeg for the fall, or even Peppermint extract for the winter holidays.
Nutrition & Storage Info
- Prep Time: 10 minutes
- Cook Time: 15 minutes
- Total Time: 25 minutes
- Yield: About 24 cookies
- Estimated Calories: 110 calories per cookie
Storage Information:
- Store at room temperature in an airtight container for 1 week, or refrigerate for up to 2 weeks. For longer storage, freeze for up to 3 months!
FAQ Section
- Can I use a different kind of jam? Absolutely! Any jam or preserve you love can work beautifully here—feel free to experiment!
- Can I make these cookies ahead of time? Yes! The dough can be refrigerated for a day or frozen for up to 3 months before baking.
- Why did my cookies spread too much? This could be due to warm butter. Ensure it’s just soft and not melted.
- What if I don’t have parchment paper? You can grease the baking sheet lightly or use a silicone baking mat if you have one.
- Can I double the recipe? Certainly! Just make sure you have enough space on your baking sheets and enough jam!
- How do I store these cookies long-term? For the best freshness, store them in an airtight container in the fridge or freeze for extended life.
- Can I use whole wheat flour? Yes, but it will alter the taste and texture slightly. Consider using half all-purpose and half whole wheat for a nice balance.
- How do they freeze? Lay the baked cookies in a single layer on a baking sheet, freeze until solid, then transfer to an airtight container.
- Can I use margarine? While you can use margarine, I recommend using real butter for the best flavor.
- What’s the best way to ensure even baking? Rotate your baking sheets halfway through baking, especially if your oven has hot spots!

Conclusion
These Strawberry Thumbprint Cookies aren’t just a recipe; they’re a bridge to warmer memories and sweet moments shared. Easy, delicious, and endlessly customizable, they are perfect for any occasion. So gather your ingredients, roll up your sleeves, and indulge in the sweet joy of baking!
I’d love to hear how your cookies turned out! Drop a comment below with your thoughts or any modifications you made. And don’t forget to check out other delightful recipes on the blog—you can never have too many cookie recipes!

Strawberry Thumbprint Cookies
Ingredients
Method
- Preheat your oven to 350°F (175°C).
- In a large mixing bowl, cream together the softened butter, granulated sugar, and brown sugar until light and fluffy.
- Add in the vanilla extract and mix until fully combined.
- Gradually add in the flour and salt, mixing until just combined.
- Roll the dough into small balls, about 1 inch in diameter, and place them on a baking sheet lined with parchment paper.
- Use your thumb to create a small indentation in the center of each ball.
- Fill each indentation with a dollop of strawberry jam.
- Bake for 12-15 minutes or until the edges are lightly golden.
- Let them cool on the baking sheet for a few minutes before transferring to a wire rack to cool completely.