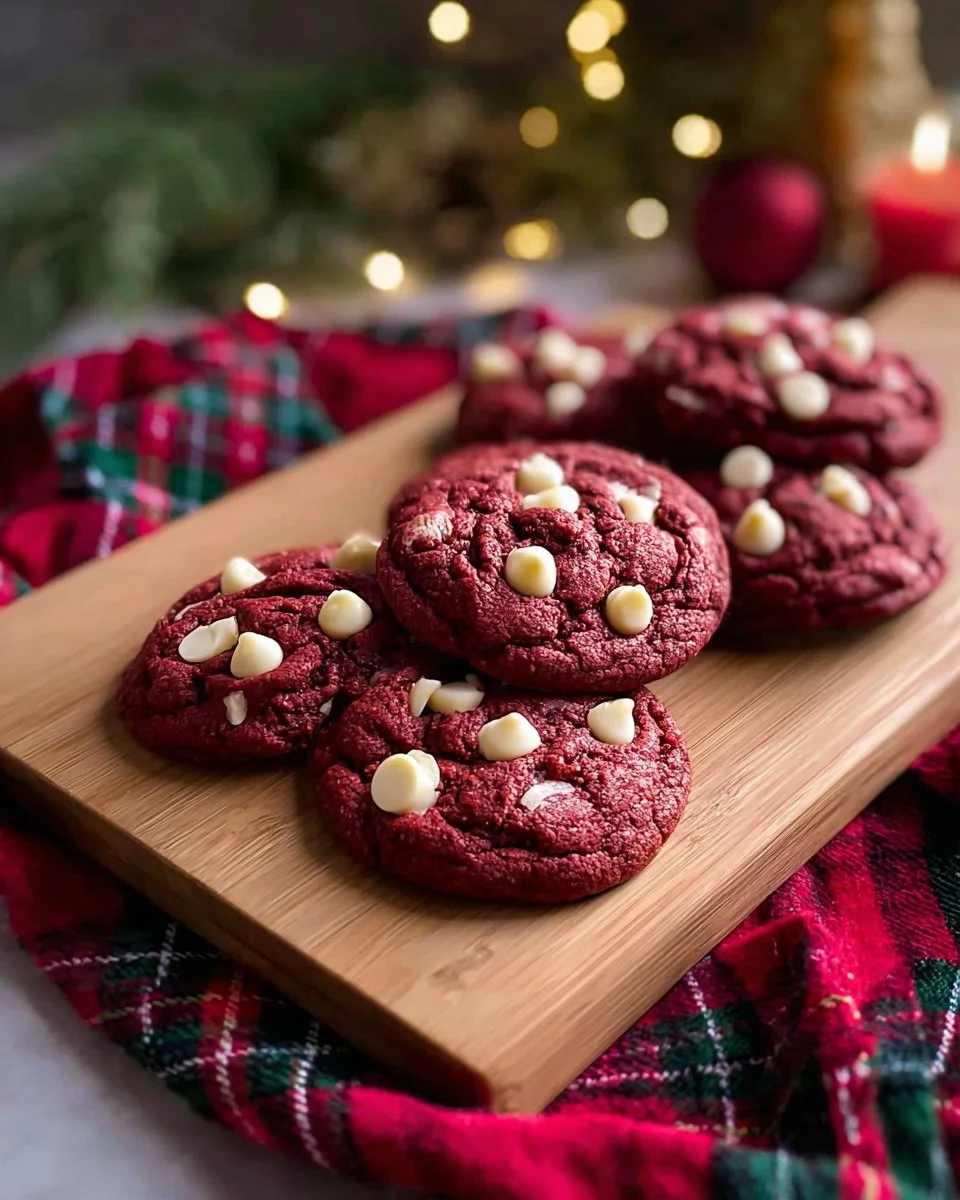
Picture this: it’s a chilly winter afternoon, the kind that begs for cozy blankets and something sweet. I find myself reminiscing about my childhood, curled up by the fireplace with my mom, savoring her homemade cookies. While the classic chocolate chip was always a favorite, there was something about the vibrant, rich color of red velvet that felt like a warm hug on a cold day. That’s when it hit me—why not combine the two? Enter my Red Velvet Hot Chocolate Cookies, a delightful fusion that has quickly become a staple in my home and an instant hit with family and friends.
What makes these cookies special? It’s not just their eye-catching color; it’s the way they blend the creamy indulgence of hot chocolate with the velvety richness of red velvet. Each bite is a melty, gooey experience, loaded with chocolate chips and mini marshmallows, perfect for satisfying your sweet tooth. And trust me, this recipe is better than any store-bought cookie you’ll find! With easy-to-follow steps, you’ll not only learn to bake like a pro but also create lasting memories in the kitchen. So grab your apron—let’s dive into a baking adventure that will leave you and your loved ones longing for more!
What Are Red Velvet Hot Chocolate Cookies?
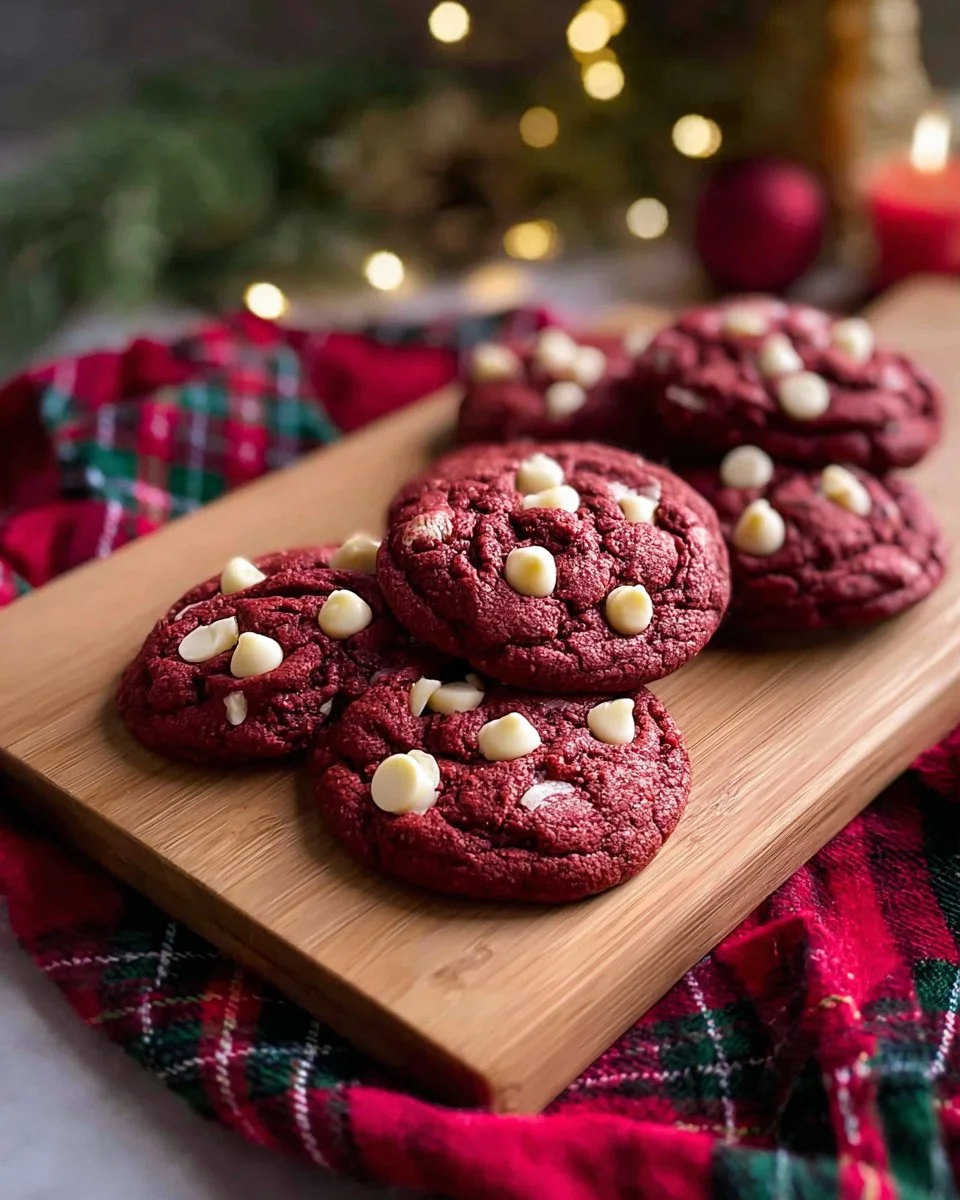
My beloved Red Velvet Hot Chocolate Cookies stem from the classic red velvet cake that’s often hailed as a Southern delicacy. Traditionally made with cocoa powder and buttermilk, this cookie adaptation brings a new level of indulgence. They are the perfect balance of soft and chewy, with a rich chocolate flavor that dances on your palate, thanks to the combination of cocoa, hot cocoa mix, and chocolate pudding.
What sets these cookies apart is their delightful appearance and taste. The stunning crimson color is sure to catch your eye, making them perfect for festive gatherings or cozy holidays. Ideal for celebrating Valentine’s Day or simply adding a touch of whimsy to your dessert table, these cookies are a decadent treat that will elevate any occasion. Whether you’re having a family game night or hosting friends, these cookies will surely impress!
Why You’ll Love This Recipe
- Irresistible Flavor: The combination of red velvet and hot chocolate creates a uniquely delicious cookie that stands out from the usual suspects. You’ll enjoy a delightful blend of chocolate and vanilla flavors, sweetened with a slight hint of espresso, making every bite memorable.
- Quality Over Quantity: Why settle for store-bought when you can whip up a batch of these heavenly cookies at home? You’ll save money while impressing your taste buds—and those of your family and friends. Plus, there’s something special about homemade treats that store-bought cookies can never replicate.
- Customizable: Feel free to play around with your add-ins! Swap in dark chocolate chips for a richer taste, or add crushed peppermint for a festive twist. You can even try incorporating your favorite nuts or dried fruits; the options are endless!
- Easy to Make: Don’t worry if you’re not a seasoned baker; this recipe is both approachable and forgiving. You’ll need minimal equipment—just a mixing bowl, a hand mixer, and a baking sheet. Plus, the step-by-step guide will ensure your success.
- Make Ahead and Freeze: Planning for a gathering? You can make the dough days in advance. Just scoop and freeze the dough balls, then bake them right before your event for freshly baked cookies that smell heavenly.
Ingredients

Here’s what you’ll need to whip up these delicious cookies:
- 1 3/4 cups butter (room temperature for easy creaming)
- 1 3/4 cups brown sugar (light or dark, as you prefer)
- 3/4 cup sugar
- 4 large eggs (room temperature aids in smooth mixing)
- 1.5 tbsp vanilla extract (pure vanilla for best flavor)
- 1.5 tbsp red food coloring (gel food coloring works best for vibrant color)
- 4.5 cups all-purpose flour (plus more for dusting)
- 1 cup instant chocolate pudding mix (for softness)
- 1/2 cup hot cocoa mix (it gives that hot chocolate flavor)
- 1/2 cup unsweetened cocoa powder, sifted
- 1/2 tsp espresso powder (to enhance chocolate flavor)
- 2 tsp baking soda
- 2 tsp salt
- 2 cups milk chocolate chips (or your favorite type)
- 2 cups white chocolate chips (for a marbled look)
- 4 cups mini marshmallows (the best melty treat inside!)
Quality Tips
- Butter: Use unsalted butter for better control over sweetness.
- Sugars: Dark brown sugar provides more moisture and depth of flavor.
- Vanilla: Always go for pure vanilla extract to elevate flavor.
- Food Coloring: Gel colors are more potent and less diluted than liquid varieties.
Step-by-Step Instructions
- Sift Together Dry Ingredients: In a medium bowl, sift together the flour, cocoa powder, instant chocolate pudding mix, hot cocoa mix, espresso powder, baking soda, and salt. Set aside. Visual cue: The mixture should look fluffy and well-combined.
- Cream the Butter and Sugars: In a large bowl, beat the butter with the brown sugar and regular sugar using an electric mixer on medium speed until light and fluffy, about 2-3 minutes. Chef’s Tip: Scrape down the sides of the bowl occasionally for even mixing.
- Incorporate Eggs and Flavoring: Add the eggs one at a time, mixing well after each addition. Then, mix in the vanilla extract and red food coloring until uniformly blended. Chef’s Tip: Don’t rush; achieving fluffiness here is key.
- Add Dry Ingredients: Gradually add the dry ingredient mixture, mixing on low speed until just combined. Be careful not to overmix—it’s okay if a few flour streaks remain.
- Fold in the Goodies: Gently fold in the milk chocolate chips, white chocolate chips, and mini marshmallows with a spatula until evenly distributed.
- Chill the Dough: Scoop the dough into balls using a cookie scoop or tablespoon, then refrigerate for at least 2 hours. Chef’s Tip: Chilling prevents the cookies from spreading too much in the oven.
- Preheat and Bake: Preheat your oven to 350°F (175°C). Line baking sheets with parchment paper. Place chilled dough balls on the sheets, spaced about 2 inches apart. Bake for 17-20 minutes, until the edges are set but the centers are still soft.
- Cool Before Enjoying: Let the cookies cool on the baking sheet for 10 minutes before transferring them to a wire rack. Chef’s Tip: This helps them firm up while still being soft and gooey inside.
Expert Tips & Tricks
- Storage: Store cookies in an airtight container at room temperature for up to 5 days, or in the refrigerator for up to 7 days for a slightly chewier texture.
- Make Ahead: You can prepare the dough ahead of time; just scoop and freeze the dough balls in a single layer, then transfer to a freezer bag. Bake directly from frozen, adding a few extra minutes to the bake time.
- Troubleshooting: If your cookies spread too much, ensure your butter is not too warm or consider adding a bit more flour next time.
- Variations: Try adding different mix-ins based on the season—think crushed peppermint candies for Christmas or orange zest for a citrus twist.
- Oven Calibration: Every oven is different. Make sure to check your cookies a minute or two before the lower end of the recommended baking time to avoid over-baking.
Serving Suggestions
These Red Velvet Hot Chocolate Cookies are delicious on their own, but pair them with a glass of cold milk, a warm cup of cocoa, or even some vanilla ice cream for an extra-special treat. You can arrange them on a beautiful platter, sprinkle with powdered sugar for elegance, or place them in a festive tin for gifting. They make great additions to holiday parties or casual get-togethers!
Variations & Substitutions
- Flavor Combinations: For a minty twist, add peppermint extract and top with crushed candy canes during the holidays.
- Dietary Adaptations: If you need gluten-free, substitute all-purpose flour with a 1:1 gluten-free blend. For a vegan version, use a flax egg, dairy-free butter, and alternative chocolate chips.
- Seasonal Variations: In spring, swap in some Easter-themed sprinkles; for fall, try incorporating pumpkin spice for a delightful seasonal twist.
Nutrition & Storage Info
- Prep Time: 15 minutes
- Cook Time: 20 minutes
- Total Time: 2 hours 35 minutes (includes chilling)
- Yield: Approximately 36 cookies
- Estimated Calories: About 200 calories each (varies with ingredients used)
Storage Instructions: Keep cookies in an airtight container at room temperature for up to 5 days. For longer storage, refrigerate for up to 1 week or freeze for up to 3 months.
FAQ Section
- Can I use liquid food coloring instead of gel?
- While you can, gel gives a more vibrant color without altering the batter’s consistency.
- What if my cookies spread too much?
- Ensure your butter is at the right temperature, and try chilling the dough longer before baking.
- Can I make these cookies gluten-free?
- Yes, swap all-purpose flour with a gluten-free flour blend for a similar texture.
- How do I know when the cookies are done?
- Look for a set edge with slightly soft centers. They’ll continue to firm up while cooling.
- How should I store my cookies?
- Store in an airtight container at room temperature or in the fridge for extra softness.
- Can I add nuts or other mix-ins?
- Absolutely! Consider adding chopped pecans or walnuts for added crunch.
- What’s the best way to freeze cookie dough?
- Scoop dough balls on a baking sheet, freeze until firm, and then transfer to a zip-top bag.
- Can I use unsweetened cocoa powder?
- Yes, unsweetened cocoa is the best option; it gives the depth of chocolate without added sugars.
- What occasion are these cookies best for?
- They’re perfect for holidays, birthdays, or just a cozy night in—great anytime!
- Can I double this recipe?
- Of course! Just be careful to mix in batches if your mixer can’t handle it.
Conclusion
These Red Velvet Hot Chocolate Cookies aren’t just a treat; they’re a journey of flavors, cherished memories, and heartfelt connections. Whether you’re baking for a holiday gathering, special celebrations, or a cozy night in, this recipe is a surefire way to impress and indulge. I encourage you to try this at home and, of course, I’d love to hear your thoughts! Please comment below with your feedback or any variations you tried. You might want to check out my other holiday baking recipes—they’re just as delightful!
Soft Halloween Red Velvet Cookies