Baking is a dance of flavors for me, a rhythm that connects me to the kitchen and memories of my childhood, where flour-covered countertops and sugary smiles ruled the day. One of my favorite recipes that sparked joy during family gatherings is none other than Cherry Cream Cheese Pinwheels. I can still visualize my grandmother rolling out puff pastry, the air filled with laughter and the sweet aroma of cherries, a perfect combination that brought us all together.
What makes these pinwheels truly special is not just the delightful blend of cream cheese and cherry pie filling, but also the nostalgia tied to each buttery, flaky bite. Unlike many store-bought pastries that can be overly sweet and artificial, my homemade version balances flavors beautifully, resulting in a comforting treat that encapsulates your childhood dreams.
Today, I promise to share with you a foolproof recipe that’s perfect for any occasion. Whether you’re hosting a brunch, surprising a friend, or just indulging yourself on a cozy evening, I’ll show you how to whip up these delectable Cherry Cream Cheese Pinwheels so you can create your own treasured memories around the dinner table.
What Are Cherry Cream Cheese Pinwheels?
Cherry Cream Cheese Pinwheels have humble origins in the classic art of baking, often celebrated for their ability to bring a burst of fruity flavor wrapped in fluffy, flaky pastry. With roots in various desserts, these pinwheels elevate simple ingredients to mouthwatering heights. The combination of smooth cream cheese and tangy cherry filling creates a luscious contrast, making each bite a delightful surprise!
These treats are rich in flavor and texture—essentially, they are puff pastry rolled with a creamy, sweet filling, then sliced to reveal swirls of pink and white, making them as visually appealing as they are tasty. Unlike dry pastries or uninspired snacks, these pinwheels boast a melt-in-your-mouth quality that leaves your taste buds wanting more. Perfect for potlucks, brunches, or cozy afternoons, these pinwheels are a versatile addition that never disappoints.
Why You’ll Love This Recipe
1. Unmatched Flavor:
This recipe brings together the best of both worlds: the rich, tangy cream cheese and the sweet, tart cherry filling blend effortlessly to create an irresistible treat.
2. Homemade vs. Store-Bought:
Let’s be real, while you can find similar pinwheels in stores, they often lack the fresh, homemade taste. Here, I promise you full control over sweetness and flavors, creating a treat that’s worth every calorie!
3. Budget-Friendly:
Making these Cherry Cream Cheese Pinwheels at home saves you money compared to buying pricey pastries at bakeries. Just a few simple ingredients yield gorgeous, impressive results.
4. Customizable:
Feeling adventurous? You can swap out the cherry filling for other favorites like blueberry, strawberry, or even a rich chocolate spread for a fun twist. The possibilities are endless!
5. Super Easy:
As a passionate home baker, I can assure you that this recipe is beginner-friendly. It is quick to prepare and takes only about 40 minutes from start to finish.
With just a handful of ingredients and a few simple steps, you’ll impress everyone with these delightful Cherry Cream Cheese Pinwheels that will disappear quicker than you can say, “Who wants seconds?”

Ingredients
For the Pinwheels:
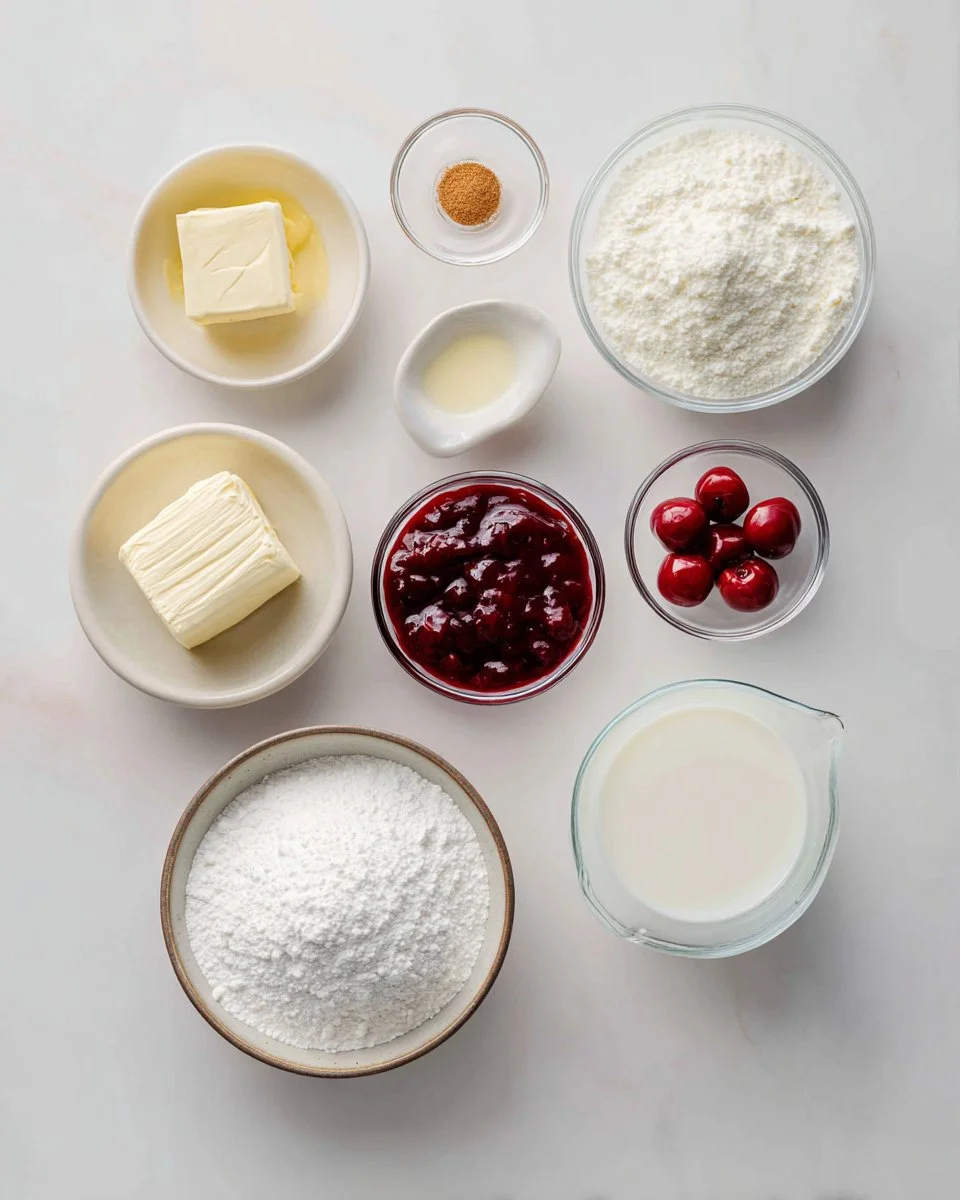
- 4 ounces cream cheese, softened: Use a high-quality brand like Philadelphia for the creamiest texture.
- 2 tablespoons unsalted butter, softened: Make sure it’s at room temperature for easy mixing.
- 1/4 cup granulated sugar: Adjust to taste depending on the sweetness of your cherry filling.
- 1 teaspoon vanilla extract: Use pure vanilla for richer flavor, and skip the imitation stuff.
- 1/2 cup cherry pie filling: Canned works well, but if you’re feeling adventurous, make your own with fresh cherries!
- 1 sheet puff pastry, thawed: I love the classic Pepperidge Farm brand for its flaky layers.
- 1 large egg, beaten: This is for brushing the pastry before baking.
- 1 cup confectioners sugar: For the sweet glaze.
- 2-3 tablespoons whole milk: Adjust to reach your desired glaze consistency.
Prep Notes:
- Ensure that both the cream cheese and butter are softened at room temperature for easy blending.
- Thaw your puff pastry according to package instructions, which usually takes about 40 minutes.
Step-by-Step Instructions
1. Preheat the Oven:
Preheat your oven to 400°F (200°C). Spray a 9-inch oven-safe skillet with cooking spray to prevent sticking.
2. Prepare the Filling:
In a medium bowl, use a hand mixer to mix the softened cream cheese, unsalted butter, and granulated sugar until the mixture is smooth and creamy—about 2 minutes. Then, blend in the vanilla extract until combined and set aside.
3. Roll Out the Puff Pastry:
On a floured surface, roll out the thawed puff pastry into a 9×12-inch rectangle. This is your canvas for all the delicious filling!
4. Spread the Cream Cheese Mixture:
Spread the cream cheese filling evenly over the puff pastry, leaving about a 1/2-inch border around the edges. Don’t skimp; the filling makes every bite divine!
5. Add the Cherry Filling:
Top the cream cheese layer with the cherry pie filling, spreading it gently to cover without disturbing the cream cheese layer too much.
6. Roll It Up:
Wet the border of the pastry with a little water to help seal it. Roll the pastry tightly into a log, creating a beautiful swirl of cream cheese and cherries, and pinch to seal the edge.
7. Slice the Pinwheels:
Using a sharp knife, slice the log into 6 pieces. Place the slices cut-side up in the greased skillet, giving them enough space to puff up while baking.
8. Brush with Egg:
Brush the tops of the pinwheels with beaten egg. This will give them that gorgeous golden-brown color in the oven.
9. Bake:
Bake for 30 minutes, then cover with aluminum foil and bake for an additional 5-8 minutes or until golden brown and puffy. You should see a delightful bubbling around the edges.
10. Prepare the Glaze:
While they bake, whisk together the confectioners sugar and whole milk to create a glaze. Adjust the milk for your desired consistency.
11. Drizzle and Serve:
Once baked, let the pinwheels cool slightly before drizzling the glaze over the top. Cut into smaller pieces if desired, and serve warm!
Chef’s Tips:
- For an even bake, rotate the skillet halfway through cooking for consistent browning.
- If you prefer extra cherry flavor, feel free to drizzle a bit of cherry syrup from the pie filling on top!
Avoid these common mistakes:
- Be careful not to overmix the cream cheese filling; a creamy consistency is key!
- Ensure the pastry isn’t overly warm; cooler pastry works best when rolling and slicing.

Expert Tips & Tricks
1. Choosing the Right Ingredients:
Using high-quality cream cheese and cherry filling impacts the final flavor significantly. Fresh ingredients yield the best results.
2. Storage Recommendations:
Leftover pinwheels can be stored in an airtight container in the refrigerator for up to 3 days.
3. Make Ahead:
You can prepare the filling and assemble the pinwheels a day in advance. Just pop them in the fridge, and bake them fresh when you’re ready to serve!
4. Troubleshooting:
If your pinwheels seem flat after baking, it’s likely the puff pastry didn’t fully thaw or was rolled too thin. Use a rolling pin minimally – just enough to smooth out!
5. Reheating:
To enjoy leftovers warm, pop them back in the oven at 350°F (175°C) for about 10 minutes to restore that flaky texture.
6. Flavor Pairing:
For an extra depth of flavor, consider adding a pinch of almond extract to the cream cheese filling!
Serving Suggestions
Cherry Cream Cheese Pinwheels are versatile enough to be paired with a variety of beverages! Serve them alongside a steaming cup of coffee or a refreshing glass of iced tea for a delightful afternoon treat.
For presentation, arrange the pinwheels on a fancy cake stand or a rustic platter drizzled with any leftover glaze for an eye-catching centerpiece at brunch. They’re perfect for cozy get-togethers, holiday celebrations, or just because it’s Tuesday!
Variations & Substitutions
Flavor Combinations:
- Blueberry Cream Cheese Pinwheels: Swap the cherry pie filling for blueberry for a delightful summer twist.
- Chocolate Hazelnut: Instead of fruit filling, spread chocolate hazelnut spread and sprinkle crushed hazelnuts before rolling.
Dietary Considerations:
- Gluten-Free Version: Use gluten-free puff pastry available at health food stores.
- Dairy-Free Adaptation: Substitute cream cheese for a dairy-free alternative made from almonds or cashews.
Seasonal Variations:
- Fall Delight: Use spiced apple filling, and add cinnamon to the cream cheese mix for a fall-inspired treat.
Nutrition & Storage Info
- Prep Time: 10 minutes
- Cook Time: 30-35 minutes
- Total Time: Approximately 45 minutes
- Yield: Serves 6
- Estimated Calories: About 250 calories per pinwheel
- Storage: Keep in an airtight container at room temperature for 1-2 days or refrigerate for 3-4 days. Alternatively, freeze for up to 3 months. Thaw and reheat before serving.
FAQ Section
Can I use homemade puff pastry?
Yes, homemade puff pastry yields fantastic results, just ensure it’s well-chilled before rolling.Can I use fresh cherries instead of pie filling?
Absolutely! Make a quick cherry compote by cooking down pitted cherries with sugar until thickened.What can I serve with these pinwheels?
They pair well with whipped cream, vanilla ice cream, or even a tangy yogurt dip.How do I know when my pinwheels are done baking?
Look for a golden-brown color on top, and the filling should bubble slightly.Can I prepare these in advance?
Yes! Assemble them, then cover and refrigerate before baking for fresh pinwheels later.What’s the best way to re-heat leftovers?
The oven is best for reheating. Use 350°F for about 10 minutes.Can I freeze these after baking?
Yes, but it’s better to freeze them unbaked to preserve freshness.What if my cream cheese isn’t soft enough?
You can microwave it for 10 seconds at a time until it’s just soft, but watch carefully!Can I double the recipe?
Yes! Just ensure you have enough skillet space or bake in batches.What if I don’t have a skillet?
You can use a baking sheet lined with parchment paper; just place the pinwheels on it instead.
Conclusion
Cherry Cream Cheese Pinwheels are more than just a treat; they’re a celebration of flavor that brings back wonderful memories. Easy to make yet stunningly delicious, they’re a delightful addition to any gathering or a sweet indulgence just for you.
I encourage you to try this recipe and let the love of baking fill your home with warmth and happiness. Don’t forget to share your feedback or comments—I love hearing how you’ve made this recipe your own! Explore more sweet inspirations right here on my blog for delicious ways to create perfect moments in your kitchen.
Happy baking!

Cherry Cream Cheese Pinwheels
Ingredients
Method
- Preheat your oven to 400°F (200°C). Spray a 9-inch oven-safe skillet with cooking spray to prevent sticking.
- In a medium bowl, mix the softened cream cheese, unsalted butter, and granulated sugar until smooth and creamy—about 2 minutes. Blend in the vanilla extract.
- On a floured surface, roll out the thawed puff pastry into a 9×12-inch rectangle.
- Spread the cream cheese filling evenly over the puff pastry, leaving a 1/2-inch border around the edges.
- Top the cream cheese layer with the cherry pie filling, spreading gently.
- Wet the border of the pastry with a little water and roll it tightly into a log. Pinch to seal the edge.
- Slice the log into 6 pieces and place them cut-side up in the greased skillet.
- Brush the tops of the pinwheels with the beaten egg.
- Bake for 30 minutes, cover with aluminum foil, and bake for an additional 5-8 minutes or until golden brown and puffy.
- While they bake, whisk together the confectioners sugar and whole milk for the glaze, adjusting the milk for consistency.
- Once baked, let the pinwheels cool slightly before drizzling the glaze on top.
- Cut into smaller pieces if desired, and serve warm.