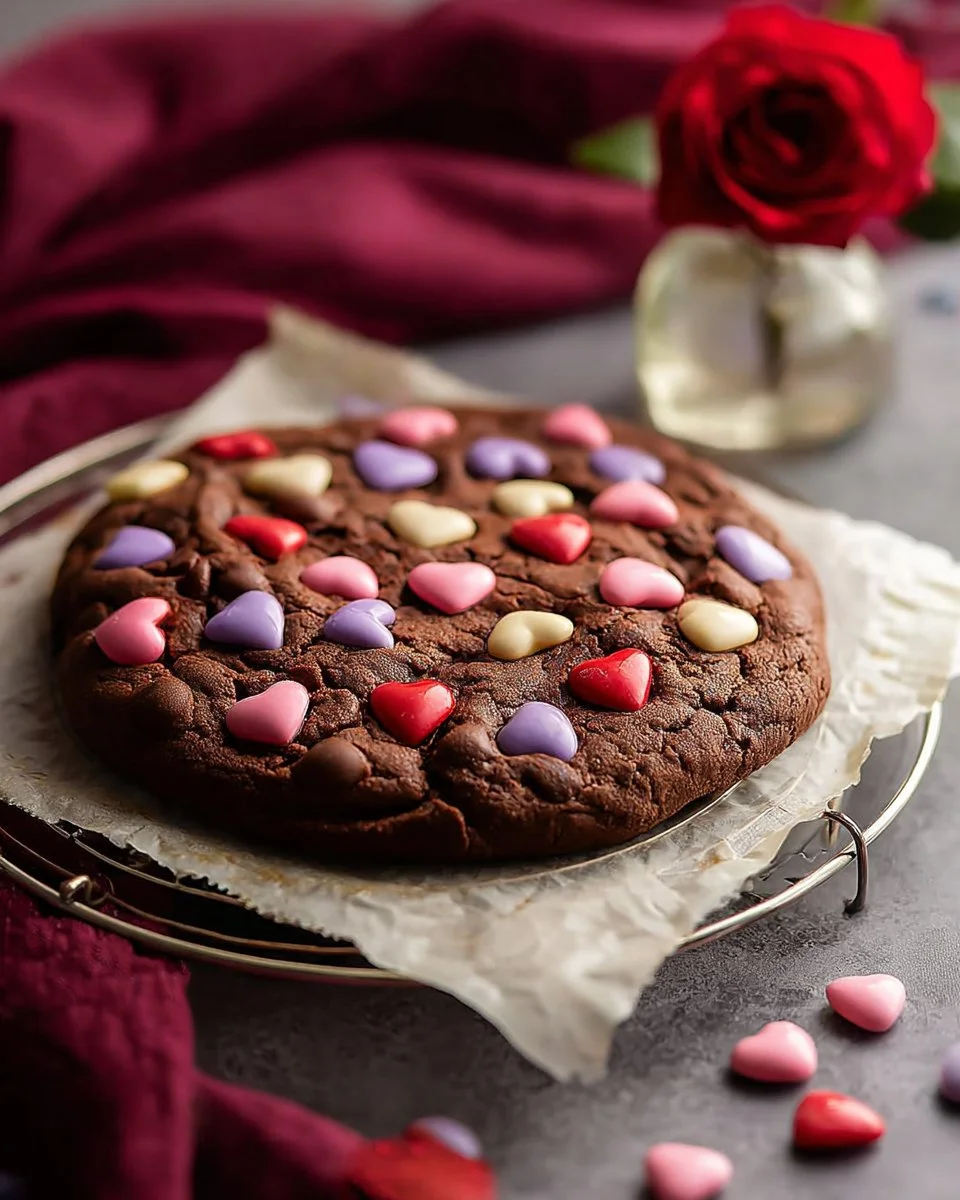
Valentine’s Day is a time for heartfelt gestures and sweet surprises, but nothing beats the joy of baking—and sharing! As a home baker, few things bring me greater satisfaction than the feeling of warm cookies baking in the oven, especially when those cookies are the size of your plate! A couple of years ago, I stumbled upon a recipe for Giant Valentine’s Day Cookies, and it was love at first bite. I remember making them for my family, watching as their faces lit up with delight.
These giant cookies are not just larger than life—they’re customizable, ooey-gooey, and perfect for expressing your love in cookie form. They stand out from ordinary cookies because they encapsulate the essence of nostalgia and comfort food. Why reach for standard store-bought treats when you can whip up a batch of these fluffy, chocolatey heart-holders at home, using ingredients that you likely already have in your pantry?
So dust off that mixing bowl and preheat your oven! In this post, I promise to guide you through creating your own Giant Valentine’s Day Cookies that are both incredibly simple to make and deeply satisfying to eat. They’re the sweet gift that keeps on giving, wrapping your loved ones in a hug from the inside out!
What Are Giant Valentine’s Day Cookies?
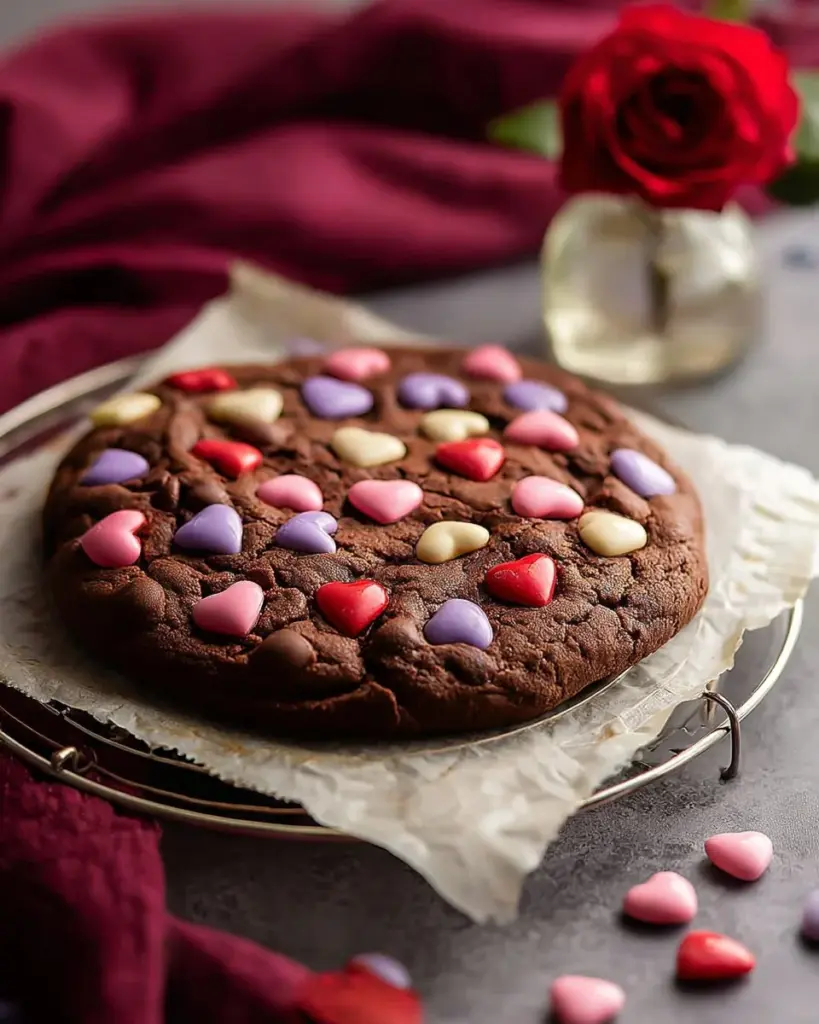
Giant Valentine’s Day Cookies originated from the classic cookie we all know but turned up several notches to create a dessert for sharing (or not!). Imagine biting into a rich, chocolate-flavored cookie that’s crisp on the outside but soft and chewy in the center. These beauties have a heavenly melt-in-your-mouth texture that makes each bite feel like a warm embrace.
What makes them truly unique is their customizable nature. You can tailor the flavors to fit your loved ones’ preferences, throwing in their favorite chocolate chips or vibrant candy-coated chocolates. These cookies are perfect for special occasions, casual family gatherings, or simply as a delicious treat to indulge in while curling up with a good book. Embrace the spirit of love and creativity in the kitchen with these giant cookies—trust me, they’re a real showstopper!
Why You’ll Love This Recipe
- Giant Size: Who doesn’t love dessert that’s double the fun? These cookies are designed to be shared (or hoarded all for yourself—no judgment here!).
- Customization Galore: The best part? You can swap out chocolate chips for butterscotch or peanut butter chips, add sprinkles, or even mix in nuts for crunch. The options are endless!
- Cost-Effective: Why splurge at bakeries when you can create a batch at home for a fraction of the cost? Plus, there’s something extra special about a homemade treat.
- Quick and Easy: This recipe doesn’t require advanced baking skills. With just a little love and attention, you can have these cookies ready in about 30 minutes—perfect for those last-minute gift ideas!
- Perfect for Any Occasion: While these cookies are clearly a perfect Valentine’s Day treat, they can easily transition into birthday parties, family movie nights, or even a cozy treat for yourself.
Ingredients

- 3 tbsp unsalted butter, softened to room temperature for easy blending; I prefer Kerrygold for its rich flavor.
- 1/3 cup brown sugar, packed—that caramel-like flavor is essential.
- 2 tbsp granulated sugar for sweetness that balances perfectly with the brown sugar.
- 1/2 egg (beat an egg and use half; you can store the remainder in the fridge for your next baking adventure).
- 3/4 tsp vanilla extract; use pure vanilla for a rich taste—my go-to brand is Nielsen-Massey.
- 1/2 cup plus 1 tbsp all-purpose flour, sifted for fluffiness.
- 1 1/2 tbsp cocoa powder; I recommend Hershey’s Special Dark for a deeper chocolatey flavor.
- 1/4 tsp baking soda for that perfect lift.
- 1/4 tsp espresso powder to enhance the chocolate flavor, optional but highly recommended!
- 1/8 tsp salt to balance the sweetness.
- 1/3 cup chocolate chips; use semi-sweet or milk chocolate according to your taste.
- 1/4 cup candy-coated chocolate pieces for that pop of color and crunch!
Step-by-Step Instructions
1. Preheat & Prep
- Preheat your oven to 350 degrees F (175 degrees C) and line a baking sheet with parchment paper. This will ensure even baking and easy clean-up!
2. Meld the Wet Ingredients
- In a medium bowl, combine 3 tablespoons of melted butter, 1/3 cup brown sugar, and 2 tablespoons of granulated sugar. Stir for about 30 seconds until the mixture is pale and fluffy—a sign that you’re on the right track.
3. Add in the Egg & Vanilla
- Now, mix in your beaten 1/2 egg and 3/4 teaspoon vanilla extract. Stir until fully combined.
4. Whisk the Dry Ingredients
- In a separate bowl, whisk together 1/2 cup plus 1 tablespoon flour, 1 1/2 tablespoons cocoa powder, 1/4 teaspoon baking soda, 1/4 teaspoon espresso powder, and 1/8 teaspoon salt. Make sure there are no lumps!
5. Combine the Mixtures
- Gradually fold the dry mixture into the wet mixture until just combined. Be gentle; overmixing can lead to a tough cookie.
6. Add Chocolate Chips
- Gently fold in 1/3 cup chocolate chips until they’re evenly distributed.
7. Shape and Bake
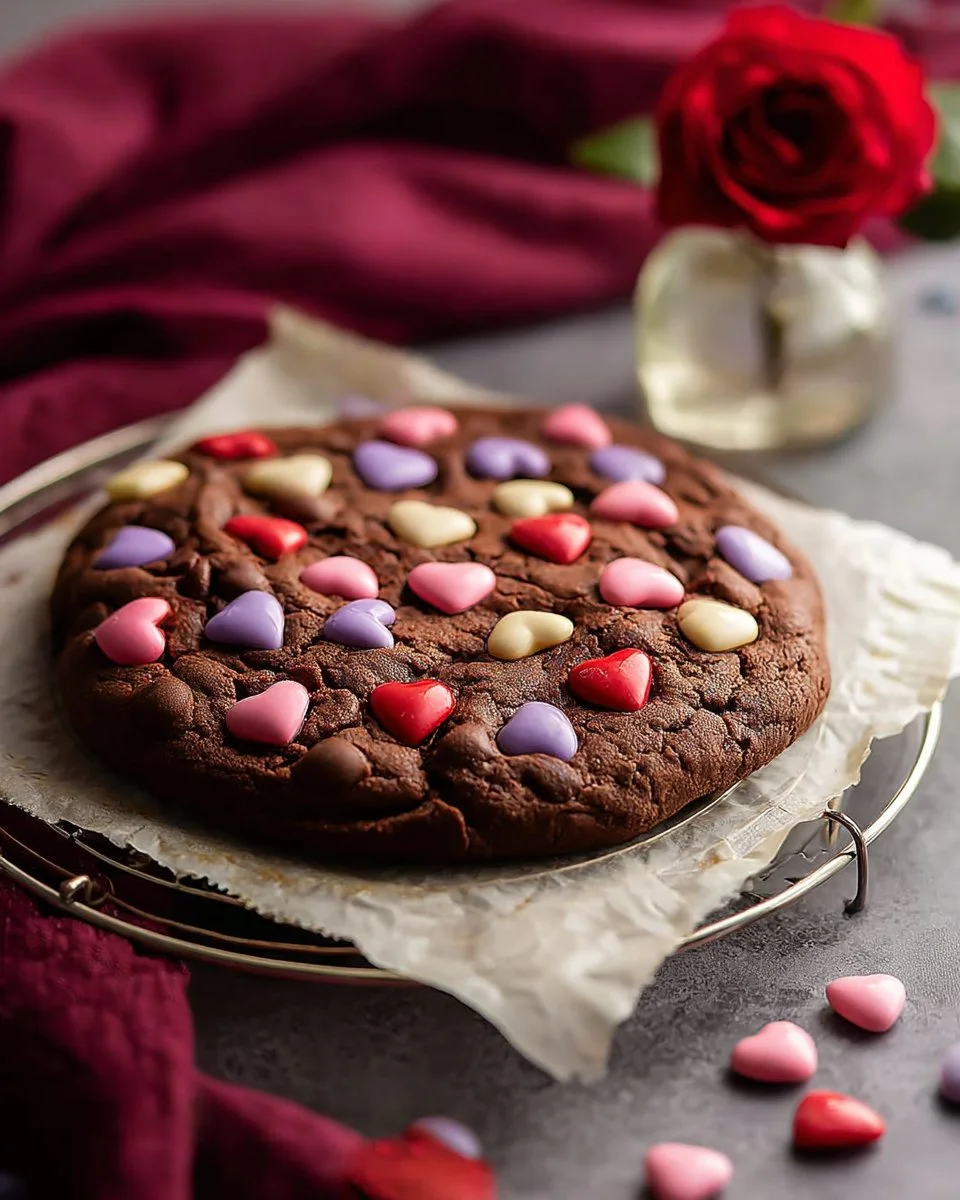
- Transfer the cookie dough onto your prepared baking sheet, shaping it into a large 7-inch circle. Press 1/4 cup candy-coated chocolates into the top, making sure they’re evenly spaced.
- Bake for 12-14 minutes until the edges are set, but the center looks slightly underdone. Remember, it will continue to cook while cooling.
8. Cool Down
- Let the cookie cool on the baking sheet for at least 5 minutes before transferring it to a cooling rack.
Chef’s Tips
- Visual Cue: The edges should look firm and the center should still be soft. If you’re unsure, it’s better to take them out a bit early!
- Common Mistake: Don’t skip lining your baking sheet—it’ll make a world of difference during the transfer!
- Feel free to personalize this recipe by adding different spices or flavors!
Expert Tips & Tricks
- Storage: Store any leftover cookies in an airtight container at room temperature for up to 5 days. If you want to keep them longer, freeze them for up to 3 months.
- Make-ahead Instructions: You can prepare the dough in advance, shape it, and freeze it. Just pop the frozen dough directly into the oven when you crave fresh cookies!
- Check for Doneness: If you’re baking multiple cookies, keep an eye on your second batch—the baking time might differ slightly depending on your oven.
- Variations: Swap out the chocolate chips for fruits like dried cranberries or even add a swirl of peanut butter for a unique taste!
- Personal Note: I’ve tried making variations of these cookies with different nuts and even oatmeal—experimenting is half the fun!
Serving Suggestions
Pair your Giant Valentine’s Day Cookies with a scoop of vanilla ice cream, a glass of cold milk, or a hot cup of coffee for the perfect treat! You can present them on a decorative platter, garnished with sprigs of fresh mint or delicate rose petals to elevate their charm when gifting to someone special.
These cookies are perfect not just for Valentine’s Day but any occasion that calls for a bit of sweetness!
Variations & Substitutions
- Flavor Combinations: Feel free to add a dash of almond extract, swap cocoa powder for your favorite nut butter, or mix in toffee bits for a delightful crunch.
- Dietary Restriction Adaptations: For a gluten-free option, use a gluten-free all-purpose flour blend. You can also use aquafaba or a flax egg (1 tbsp flaxseed meal + 2.5 tbsp water) instead of the egg for a vegan version.
- Seasonal Variations: For a seasonal twist, add festive sprinkles or use pastel-colored candy-coated chocolates for Easter!
Nutrition & Storage Info
- Prep Time: 10 minutes
- Cook Time: 12-14 minutes
- Total Time: 25-30 minutes
- Yield: 2 large cookies
- Estimated Calories: Approximately 350-400 calories per cookie, depending on specific ingredients used.
Storage Instructions:
- Room Temperature: Store in an airtight container for up to 5 days.
- Fridge: Can be kept in the fridge for up to a week.
- Freezer: Freeze the dough or baked cookies for up to 3 months.
FAQ Section
- Can I use unsweetened cocoa instead of sweetened?
- Yes, just keep in mind that it may affect the overall sweetness!
- Can I add nuts to the batter?
- Absolutely! Adding nuts like pecans or walnuts will bring an exciting crunch.
- Why isn’t my cookie rising?
- Ensure your baking soda is fresh; old leavening agents can affect the rise.
- How can I achieve a thicker cookie?
- Chill the dough in the refrigerator for 30 minutes before baking to create thicker cookies.
- What if the cookies are too hard?
- You may have overbaked them or used too much flour. Ensure proper measuring and baking times for future references.
- Can I make smaller cookies?
- Of course! Just decrease the baking time accordingly for smaller cookie sizes.
- Can these cookies be made dairy-free?
- Yes, just swap the butter for coconut oil or a dairy-free butter substitute!
- How can I make these cookies extra chocolatey?
- Add chocolate chunks along with chips or increase the cocoa powder slightly.
- What type of chocolate chips do you recommend?
- I love using semi-sweet for a balanced sweetness, but go with your favorite!
- Can I use powdered sugar instead of granulated?
- It’s not recommended as the texture and structure of the dough will change, leading to different results.
Conclusion
These Giant Valentine’s Day Cookies are more than just a sweet treat; they’re a way to show your loved ones just how much you care. With their customizable charm and delightful taste, they’ll become a new family favorite in no time.
Do give this recipe a try, and I’d love to hear your thoughts! Please drop a comment below with your experiences or any personal twists you made to the recipe. And if you’re looking for more deliciously sweet ideas, don’t forget to check out my other recipes on the blog!
Pan Eggs Breakfast Thai Style (Kai Grata)
Happy baking and sharing!
Giant Valentine’s Day Cookies
Ingredients
Method
- Preheat your oven to 350 degrees F (175 degrees C) and line a baking sheet with parchment paper.
- In a medium bowl, combine melted butter, brown sugar, and granulated sugar. Stir until pale and fluffy.
- Mix in the beaten egg and vanilla extract until fully combined.
- In a separate bowl, whisk together flour, cocoa powder, baking soda, espresso powder, and salt until free of lumps.
- Gradually fold the dry mixture into the wet mixture until just combined.
- Gently fold in the chocolate chips.
- Transfer dough onto the baking sheet, shaping it into a 7-inch circle. Press candy-coated chocolates into the top.
- Bake for 12-14 minutes until edges are set, but the center is slightly underdone.
- Let the cookie cool on the baking sheet for at least 5 minutes before transferring it to a cooling rack.