Growing up, the scent of freshly baked bread wafting through my family kitchen was nothing short of magical. My mom had a special knack for crafting the flakiest, most indulgent breads with alternating layers of rich butter and delicate dough. One standout favorite was what we called “Laminated Dough Bread.” The crispy exterior and soft, fluffy interior felt like a cozy hug with each bite.
The beauty of this bread lies not just in its taste, but also in the memories it conjures—gathering around the table with my family, sharing laughter and stories, all while savoring a slice of butter-basted goodness. Through trials and triumphs, I’ve refined my recipe for Laminated Dough Bread, elevating it beyond traditional methods. Unlike store-bought versions that can sometimes feel heavy or bland, this homemade treat strikes the perfect balance between rich and light, ensuring that every slice is pure perfection.
Join me as I guide you through the art of making your very own Laminated Dough Bread. I promise you will learn the techniques to achieve that perfect lamination and the little secrets that make this recipe stand a cut above the rest.
What Are Laminated Dough Bread?
Laminated Dough Bread has its roots in European baking traditions, particularly French pastry making. The technique involves folding layers of butter into the dough multiple times to create those delightful flaky layers that many of us associate with croissants and puff pastries. However, this bread takes on a unique identity of its own, boasting a beautiful golden crust and a tender, airy interior.
The taste is wonderfully complex, with nutty, buttery undertones that play beautifully alongside its light texture. Every bite brings an enticing crunch followed by a soft, melt-in-your-mouth experience. Whether served plain or adorned with your favorite spreads, this bread is perfect for breakfast, brunch, or anytime you’re in need of some carb comfort!
I love making this bread for special occasions—think holidays or family get-togethers—certainly a showstopper that will impress your guests and make them feel truly loved.
Why You’ll Love This Recipe
- Restaurant-Quality at Home: Imagine the joy of slicing into homemade Laminated Dough Bread that rivals your favorite bakery. The crispy crust and soft, buttery layers will make you rethink every store-bought loaf you’ve ever purchased.
- Cost-Effective: Baking this bread at home is wallet-friendly. Why spend extra on artisanal loaves when you can create something better for a fraction of the cost? Plus, you’ll appreciate the satisfaction of baking from scratch!
- Customization Options: Feeling adventurous? You can easily infuse flavors or add chocolate, nuts, or dried fruits for a personalized touch. The variations are endless, making each loaf uniquely yours!
- Easy to Follow: Don’t let the term “laminated” intimidate you! This recipe is accessible for home bakers of any level. With a little patience, you’ll master the art of lamination in no time.
- Memorable Baking Experience: Baking is not just about the end product; it’s also about the process. You’ll bond with your kitchen, develop new skills, and create beautiful memories—just like I did with my mother.
Let’s roll up our sleeves and dive into the ingredients that will make this delicious bread a reality!

Ingredients
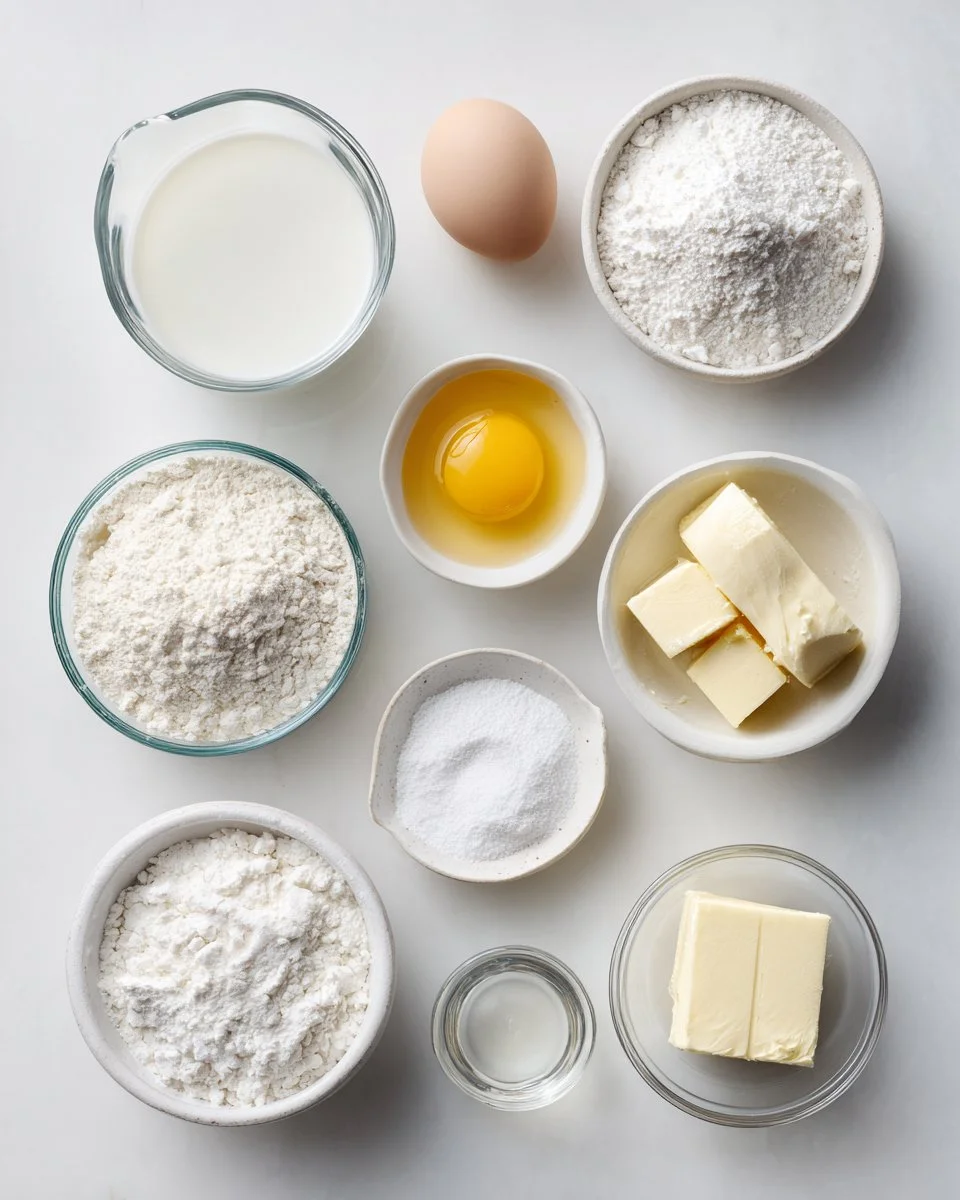
- 1 cup milk (warmed to 105-110 degrees F): This temperature is essential for activating the yeast.
- 2 1/4 tsp yeast (active dry): Make sure it’s fresh; this is what makes your bread rise!
- 4 tbsp sugar: Adds a touch of sweetness and helps to feed the yeast.
- 1 1/2 tsp salt: Balances flavors.
- 3 tbsp butter (softened to room temperature): This should be at a creamy consistency; it’s easier to mix.
- 3 1/4 cups all-purpose flour: For the best texture, consider using a high-quality brand like King Arthur Flour.
- 1/2 tsp vanilla extract: A secret weapon for flavor!
- 3/4 cup unsalted butter (for lamination): Ensure it’s very soft but not melted; you’ll be using this for the magic layers.
- 1 egg (for egg wash): Helps achieve that beautiful golden crust on top.
- 1 tbsp water (for egg wash): This will thin out the egg wash for easy brushing.
Quality Notes: Always use high-quality ingredients as they greatly affect the outcome of your bread, especially the butter and flour.
Step-by-Step Instructions
- Prepare the yeast mixture: In a large bowl, combine the warm milk, yeast, and sugar. Let it sit for about 5 minutes until foamy—this indicates that your yeast is alive and ready to work!
- Make the dough: Add the softened butter, salt, and 2 cups of flour to the yeast mixture. Beat vigorously for about 2 minutes until well combined.
- Knead the dough: Gradually add in the remaining flour and the vanilla extract until a soft dough forms. Knead for about 5 minutes until smooth and elastic.
- Let it rise: Transfer the dough to an oiled bowl, cover it with a damp cloth, and let it rise in a warm place for 1.5 to 2 hours or until doubled in size.
- Chill the dough: Once risen, flatten the dough and chill it in the fridge for about 20 minutes. This helps with the lamination process.
- Lamination process: On a lightly floured surface, roll out the chilled dough into a rectangle. Place slices of room-temperature unsalted butter in the center, fold the sides over the butter, and roll out gently. Chill again for 20 minutes.
- Repeat folding: Repeat the folding and rolling process two more times, chilling for 20 minutes between each time. This step is crucial for achieving those flaky layers.
- Shape the dough: Roll the dough into a log and cut it into equal pieces. Place the pieces in a greased loaf pan, leaving space for them to rise.
- Second rise: Cover the pan and let the dough rise for an additional 45 to 60 minutes, or until visibly puffed.
- Preheat the oven: While the dough is rising, preheat your oven to 350 degrees F (175 degrees C).
- Bake the bread: Brush the top of the dough with the egg wash (egg mixed with water) and bake for 25 minutes. After this, cover with foil and continue baking for another 35 minutes to ensure even cooking through the center.
- Cool and enjoy: Let the bread cool in the pan for about 30 minutes before transferring it to a wire rack to cool completely.
For that perfectly crafted bread, keep an eye out for the golden color and a slight tap on the bottom should yield a hollow sound.

Expert Tips & Tricks
- Ingredient Temperature: Ensure all your ingredients are at room temperature, except for the butter for lamination.
- Avoid Overworking the Dough: Knead until just combined; excessive mixing can lead to tough dough.
- Temperature Control: If your kitchen is too warm, consider placing your dough in a cooler area to avoid overproofing.
- Egg Wash Variations: For added shine, consider brushing the bread with milk or cream instead of an egg wash.
- Storage: Store leftover bread in an airtight container at room temperature for up to 3 days, or wrap tightly and freeze for longer storage.
- Make-Ahead Option: You can prepare the dough up to the shaping step and refrigerate it overnight for an easier baking day!
Serving Suggestions
This Laminated Dough Bread is perfect for brunch spreads. Try serving it alongside a light salad, or simply with butter and homemade jam. Presentation is key—slice the bread into thick pieces and arrange them on a wooden board, garnished with fresh herbs for a rustic touch.
It’s great for special occasions like Easter or holiday brunches when you want to impress guests with a delightful homemade touch.
Variations & Substitutions
Flavor Infusions
- Herb-Infused Bread: Mix in dried herbs like rosemary or thyme into the dough for a savory twist.
- Sweet Treats: Add chocolate chips or cinnamon sugar between layers for a sweet, dessert-style bread.
Dietary Adaptations
- Gluten-Free Option: Consider a gluten-free flour blend designed for baking, adjusting consistency as necessary.
- Dairy-Free Version: Use coconut milk and vegan butter substitutions; the lamination technique still works beautifully.
Nutrition & Storage Info
- Prep Time: 2 hours (not including rising time)
- Cook Time: 1 hour
- Total Time: 3 hours+
- Yield: About 10 servings
- Estimated Calories per Serving: Approximately 250 calories
- Storage Instructions: Best consumed fresh. Store in an airtight container at room temperature for up to 3 days, or freeze for up to a month. Let it cool completely before freezing.
FAQ Section
- Can I use whole wheat flour instead of all-purpose flour?
- Absolutely! Keep in mind that whole wheat will change the texture slightly, and you may need to add a bit more liquid.
- Why is my dough sticky?
- Sticky dough can be a sign of humidity or not enough flour. Dust the surface lightly with flour while kneading.
- What if my bread doesn’t rise?
- Ensure that your yeast is fresh and that the environment is warm enough for rising.
- Can I add fillings to this bread?
- Yes! Cheese, nuts, or even savory spreads can be added between lamination layers.
- How can I tell when the bread is done baking?
- The bread should be golden brown on top and sound hollow when tapped on the bottom.
- Can I freeze the dough before baking?
- Definitely! Prepare the dough, shape it, place it in a greased loaf pan, and freeze at this stage.
- How do I reheat leftover bread?
- Warm slices in a toaster or wrap the entire loaf in foil and bake at 350°F for 10-15 minutes.
- How can I achieve a better crust?
- Bake the bread on a stone or with a pan of hot water in the oven for added steam.
- Can I make this bread without a stand mixer?
- Yes! All steps can be done by hand; just ensure thorough mixing and kneading.
- What do I do if my bread is too dense?
- This can happen if the dough was over-kneaded or not given enough time to rise; ensure to fine-tune both next time.
Conclusion
This recipe for Laminated Dough Bread is not just a method—it’s a beautiful journey into the world of baking that blends family tradition with culinary art. The unique delight of each layer will make your heart full and your tastebuds dance! I encourage you to try making this bread; it will certainly bring smiles to your loved ones and create lasting memories.
If you love this recipe as much as I do, please share your experiences in the comments! Don’t forget to check out my other favorite recipes on the blog for more baking inspiration.
Happy baking!

Laminated Dough Bread
Ingredients
Method
- In a large bowl, combine the warm milk, yeast, and sugar. Let it sit for about 5 minutes until foamy.
- Add the softened butter, salt, and 2 cups of flour to the yeast mixture. Beat vigorously for about 2 minutes until well combined.
- Gradually add in the remaining flour and the vanilla extract until a soft dough forms. Knead for about 5 minutes until smooth and elastic.
- Transfer the dough to an oiled bowl, cover it with a damp cloth, and let it rise in a warm place for 1.5 to 2 hours or until doubled in size.
- Once risen, flatten the dough and chill it in the fridge for about 20 minutes.
- On a lightly floured surface, roll out the chilled dough into a rectangle. Place slices of room-temperature unsalted butter in the center, fold the sides over the butter, and roll out gently. Chill again for 20 minutes.
- Repeat the folding and rolling process two more times, chilling for 20 minutes between each time.
- Roll the dough into a log and cut it into equal pieces. Place the pieces in a greased loaf pan.
- Cover the pan and let the dough rise for an additional 45 to 60 minutes.
- Preheat the oven to 350 degrees F (175 degrees C).
- Brush the top of the dough with the egg wash and bake for 25 minutes. Then cover with foil and continue baking for another 35 minutes.
- Let the bread cool in the pan for about 30 minutes before transferring it to a wire rack to cool completely.